

After having used a DSLR for astrophotography for as long as I can remember I decided to step things up a notch and get a dedicated astrophotography camera. The benefits over the DSLR seemed well worth the trouble of making the change. The ability to cool the sensor and reduce noise while taking long exposures and the increased megapixel count from my Nikon D5100 were just a couple of reasons.
So I weighed the options between choosing a CCD (Charged Coupled Device) or CMOS (Complementary Metal Oxide Semiconductor) camera. There are pro’s and con’s associated with both devices. I won’t run down that rabbit hole in this article but I will point out that the CMOS devices have come a long way in the past decade where CCD’s typically dominated. I think it’s a fair statement to say that CCD’s were the standard high-end digital imaging device not too long ago, and at the same time they were very expensive and thus not within easy reach of most backyard imagers. CCD’s are still in use and provide amazing images but the cooled CMOS cameras with their relatively lower price have become the new standard used by amateur astronomers. Following that lead as well as my budget pointed me to a CMOS camera.
Then there was the decision that had to be made to go with a one shot color (OSC) or monochrome camera. This is not a small decision given the available facts, mainly that monochrome cameras are with out a doubt a better choice by design when you are looking for the best or strongest signal. The mono cameras do not have the Bayer filter matrix laid on top of the sensor like DSLRs and OSC cameras do. It’s the Bayer filter mosaic on these camera’s sensors that determines whether the individual pixel(s) are going to render the light they capture in red, green or blue (RGB). The Bayer filter typically limits the pixels to capturing two green pixels for every red and blue pixel, and this in the end is what provides you a color image. Imaging with a DSLR or OSC without any additional filters is known as “Broadband” imaging.
To generate a color image using a monochrome camera the process is a little more involved. Individual red, green and blue filters must be used and images shot with each filter and are then combined in post processing to produce a color image. A mono camera only takes black and white images unless filters are used. As a result more time is spent capturing a target using a mono camera. But the mono camera also has another benefit. You can use it to do “Narrowband” imaging.

This is where narrowband filters in Ha (Hydrogen-Alpha), OIII (Oxygen III), and SII (Sulfer-II) are used in place of the RGB filters. These filters only allow the specific wavelength of light they are designed to pass through, and thus restrict all other bands in the visual spectrum including the bothersome areas associated with light pollution. This means the added benefit of capturing only the light you want and not the extraneous stuff such as street lights, sky glow and moonlight.
There are several combinations of narrowband filters that can be used to create an image. The one I’ve mentioned above (Ha, OIII and SII) is known as the Hubble Space Telescope (HST) palette or simply the Hubble palette. It should be noted that Narrowband imaging can be done with a OSC camera but the mono camera has a leg up here as well since the previously mentioned Bayer filter is not present.
So if the OSC camera is so much like a DSLR why bother? Well there are a couple of major benefits to the OSC camera over the DSLR. First the ability to reduce hot pixels and dark current noise by using two-stage thermal electric cooling (TEC). This means the sensor can be cooled down to about minus 40 degrees C below ambient temp. This is a major improvement over the DSLR. Second, the IR Cut filter found on DSLRs is designed to block UV and IR wavelengths from reaching the sensor to a much greater degree since they are typically used in a normal daylight setting. This means that up to 90% of the red light (H-Alpha) emitted by many nebulae in the night sky will be filtered out of your data – certainly not what you want to happen when astro imaging!
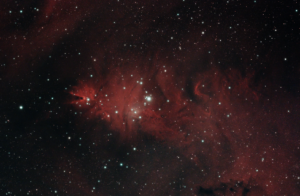
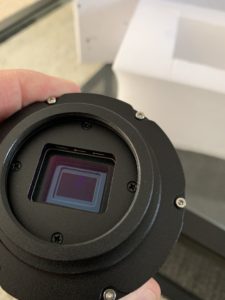
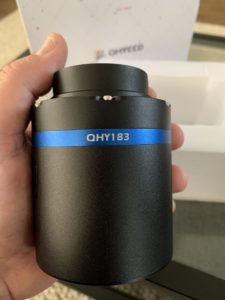
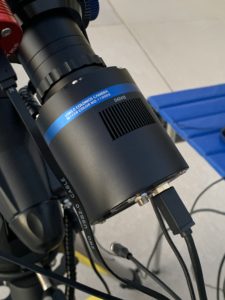
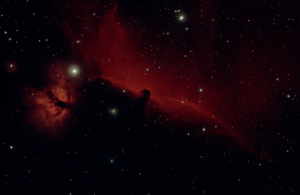
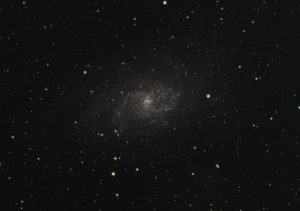
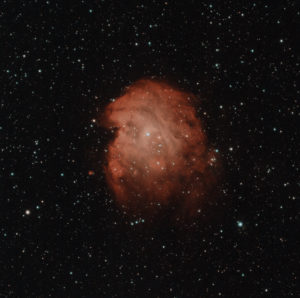
After quite a bit of research and double checking I came to the decision that a dedicated astro camera would work best for me and my budget if I sprang for a cooled, one shot color, CMOS camera. The aged QHY183C which uses the 1″ Sony IMX183, 20 megapixel back-illuminated CMOS camera sensor was the model I chose. My first few images with the camera have proved to be a major step up from my unmodified DSLR. The QHY183C has surpassed my expectations and pairing it with Optolong’s L-eXtreme dual band narrow band filter has proved to be a game changer for my imaging. Thus far I have been extremely satisfied with the camera and look forward to shooting many more targets this summer.
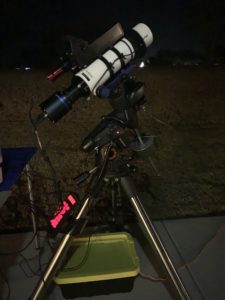
It’s important to note that several factors were involved in choosing this specific camera. The camera you select needs to be a good fit for your telescope and it all comes down to the quality of your “seeing conditions.” Seeing conditions, as the term might suggest, relates to how turbulent the atmosphere is at a given time. Typically twinkling stars indicate bad seeing. Seeing conditions are measured in arcseconds. Exceptional seeing is typically labeled as 1.0” and poor seeing is labeled as 5.0”. Under average seeing conditions, a resolution of 1.5”/pixel to 3.0”/pixel is recommended.
The following holds true for any digital camera you plan on using with your telescope (DSLR, OSC or Mono). What you need to be concerned about is “arc pixels per second.” The camera’s pixel size as it relates to your telescope’s focal length. Arc pixels per second is easy to calculate. You just need the camera’s pixel size and your telescopes focal length to perform the calculation. The formula is:
(Camera’s pixel size / Focal length of telescope) * 206.3 = Angular resolution (arcseconds/pixel)
The excepted angular resolution number you are wanting to see when it comes to your camera and telescope combo is a number somewhere between 1.0 and 2.0. So to calculate the arc pixels per second for my setup it would look like this (2.4 / 350) * 206.3 = 1.41. That 1.41 falls in the important 1-2 range and so I can rest assured that I won’t be under or oversampling. Undersampling just means there are too few pixels to capture the image the telescope provides. Oversampling means the light is spread over more pixels than needed to achieve full resolution. Oversampling typically means you have to increase your time imaging the target.
I hope this information has been helpful to those interested in moving up from a DSLR to a dedicated astronomy camera such as the QHY183C. The QHY183 is also available in a mono version, and not only from QHY but ZWO as well. At some point in my journey I’m sure I’ll take things a step further and invest in a mono camera, filter wheel and filter set. But for now I’m having a ball with the 183, and as I mentioned earlier in this article I’m very much looking forward to capturing some great summer objects such as the Lagoon, Trifid, Omega and Eagle nebulas as well as some hot spots in Cygnus.
Clear skies,
Scott